

Creating an activity for a particular entity in Dynamics 365 takes ages as you have to make a whole trip from header to accounts/contacts to record and then finally you get to create an appointment or task.
And this might look okay too if you have to create only a single appointment in a day but if you are handling a lot of accounts then this activity can be quite consuming and is sure to take away your productive hours.
So here we are with this blog that explains how to create single as well as multiple activities right from the map using Dynamics CRM map integration. There are a lot of options available on MS AppSource and you can pick one that fits your workflow.
For demonstration, we’ve taken MappyField 365 in this blog.
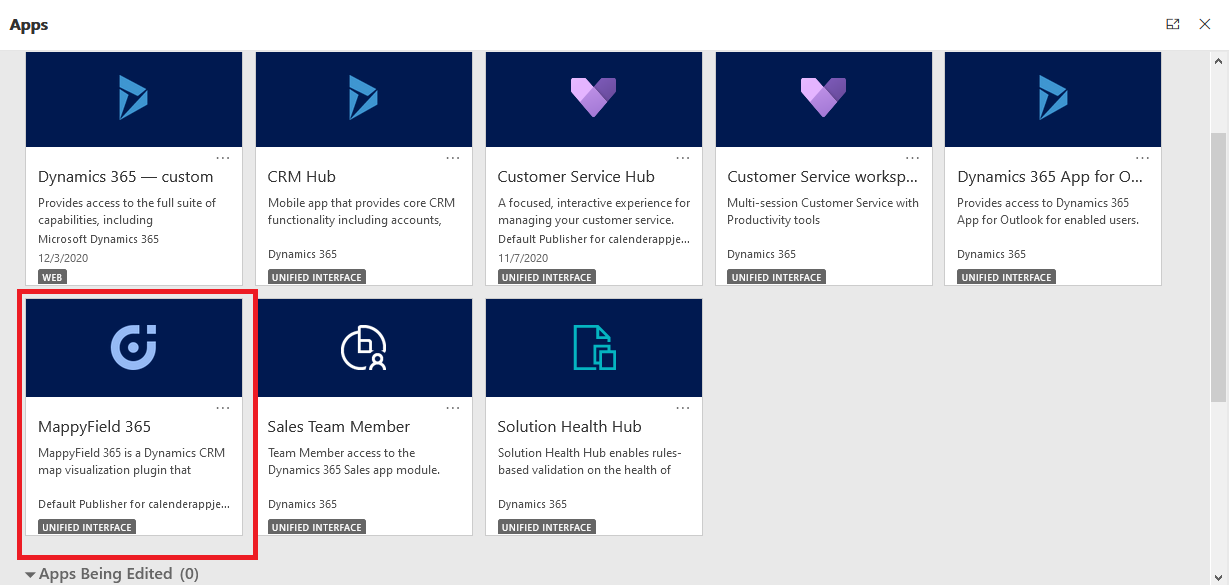
Step 1: Navigate to MappyField 365
After logging into Dynamics 365, click on “MappyField 365” from the Dynamics 365 apps dashboard.
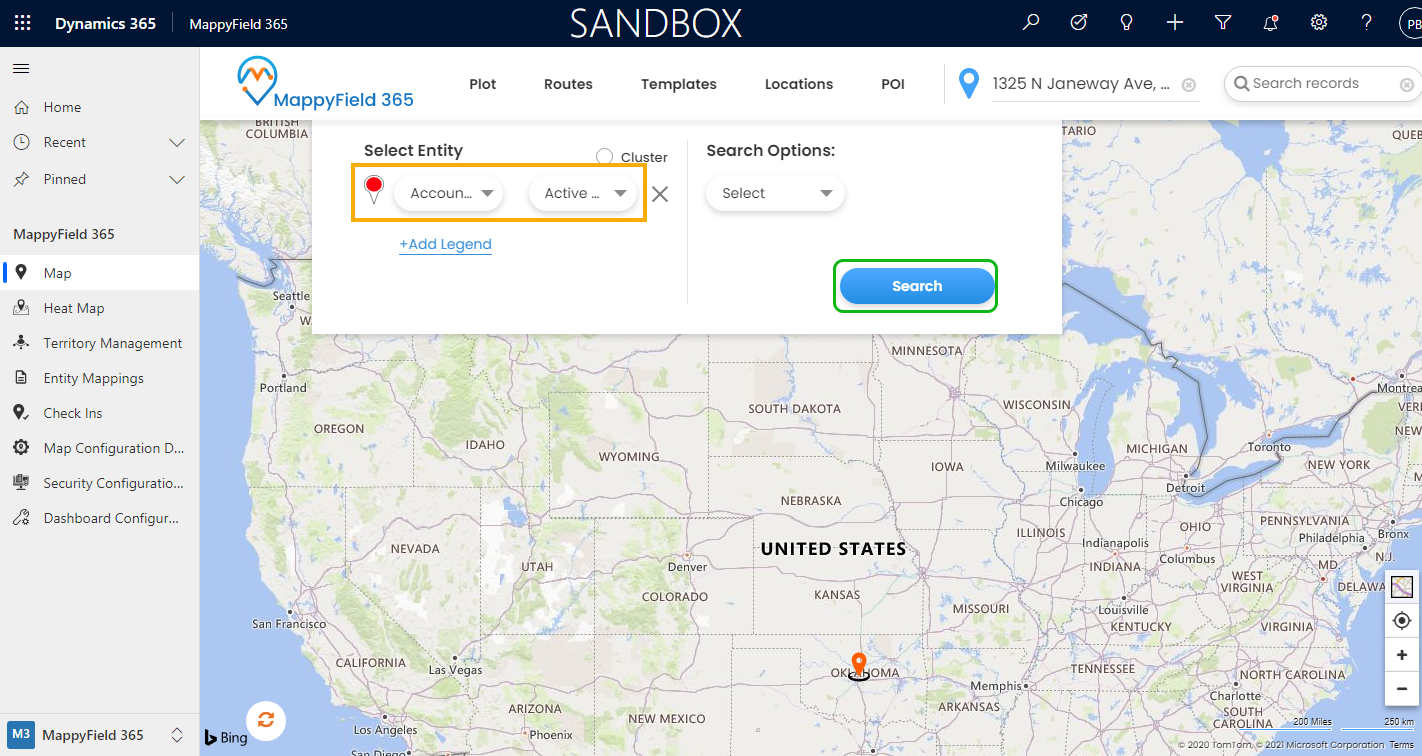
Step 2: Plot records on MappyField 365 map
Plot the records on the map by selecting the CRM entities that are configured from Entity mappings. Under the Plot tab, select the Entity and its Records view.
Step3: Add Appointment / Task activity for the CRM Records
Step 3 (A): Add Appointment/Task for ‘single’ entity record
Once the data is plotted on the map, click on the pushpin of a particular entity for which you want to create an activity (appointment/task).
For example, if you want to create an ‘appointment’ for a specific plotted account record on the map, click on the pushpin of that account record.
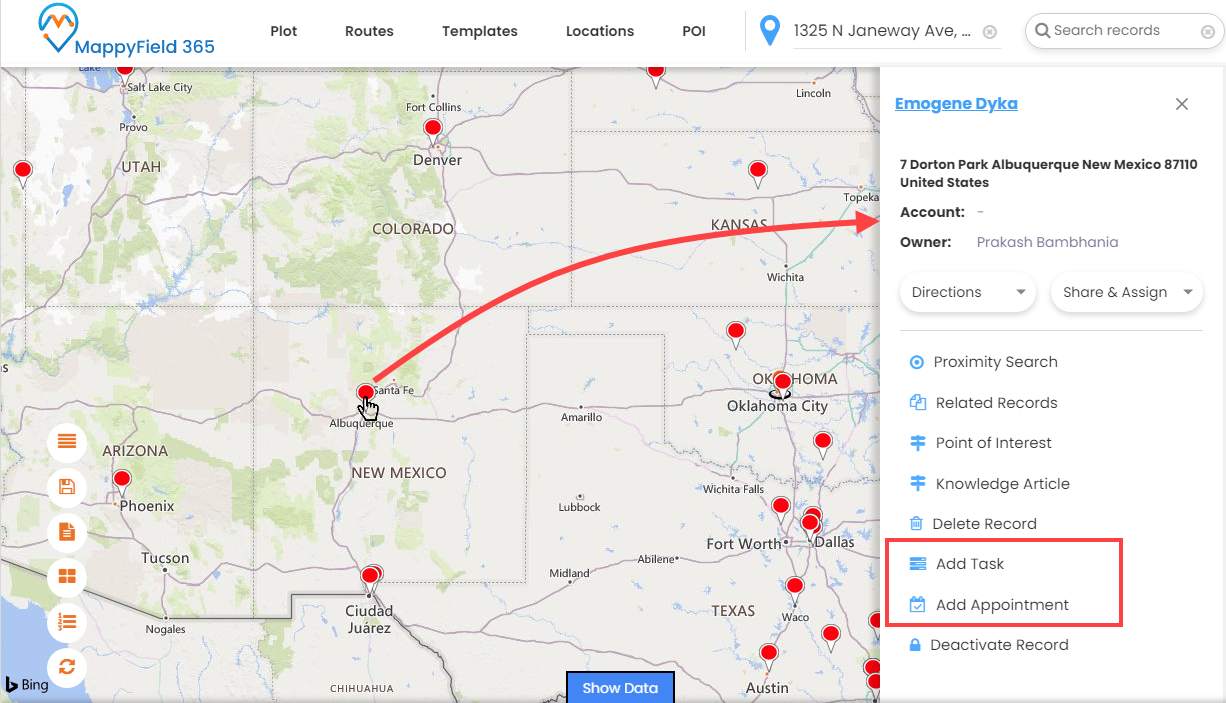
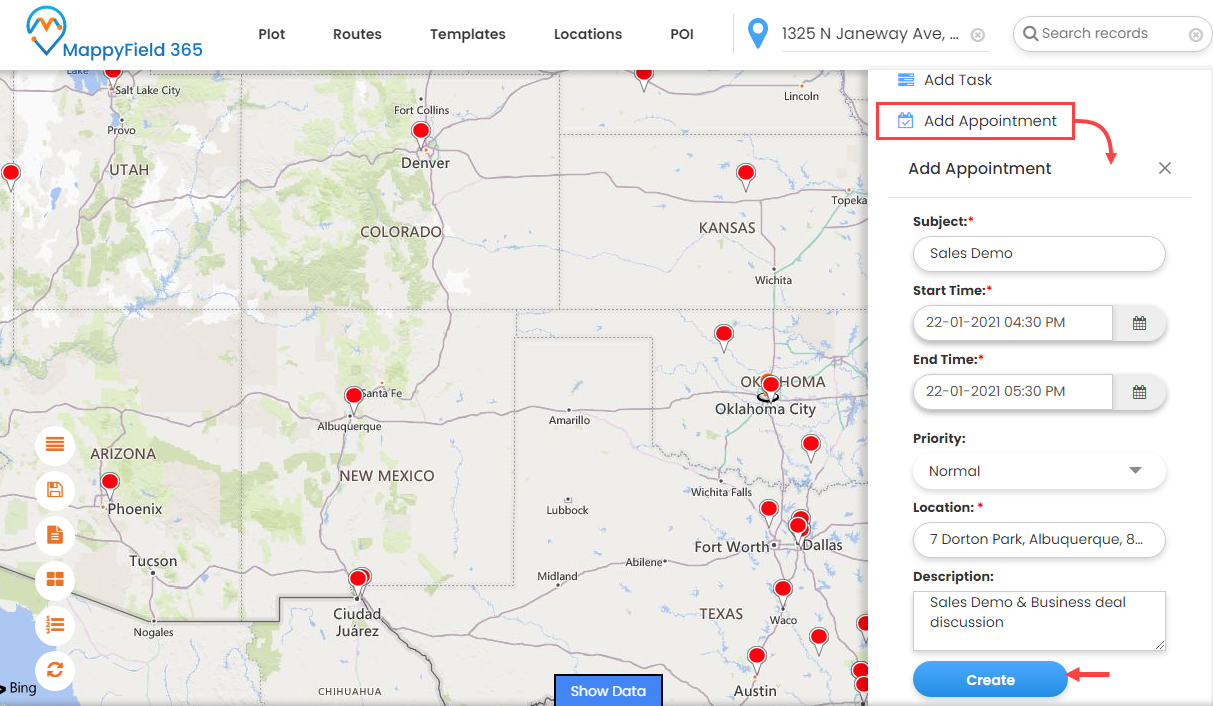
From the detail view, click on the “Add Appointment” option; Add Appointment details will appear. Insert the required details and click on the ‘Create’ button to add the Appointment for the selected record.
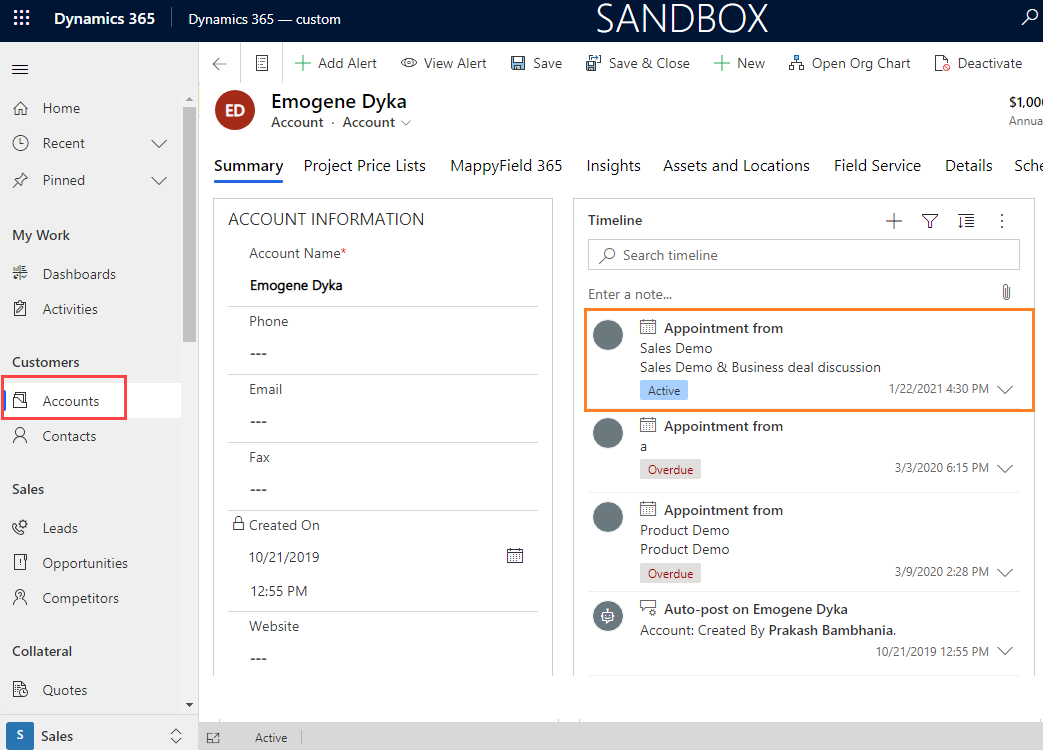
Check the added activities:
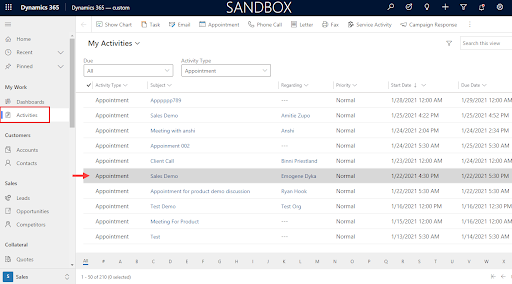
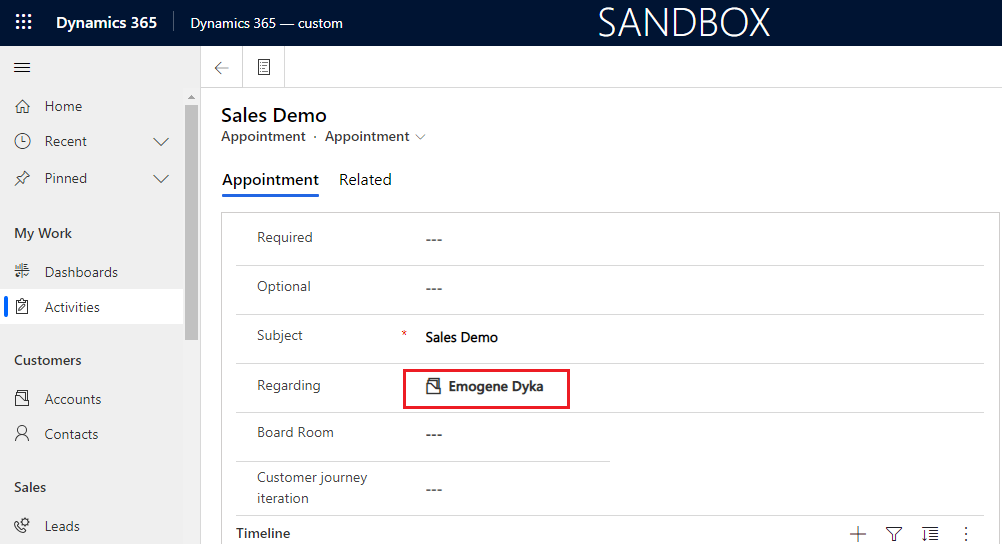
The sales manager (or administrator) can check the added activities from the Dynamics CRM side by navigating to the individual entity record or by navigating to the specific activity.
The sales manager can check the added activity (i.e. Appointment) by navigating to the detail page of that specific entity record.
Step 3 (B): Add Appointment/Task for ‘Multiple’ records
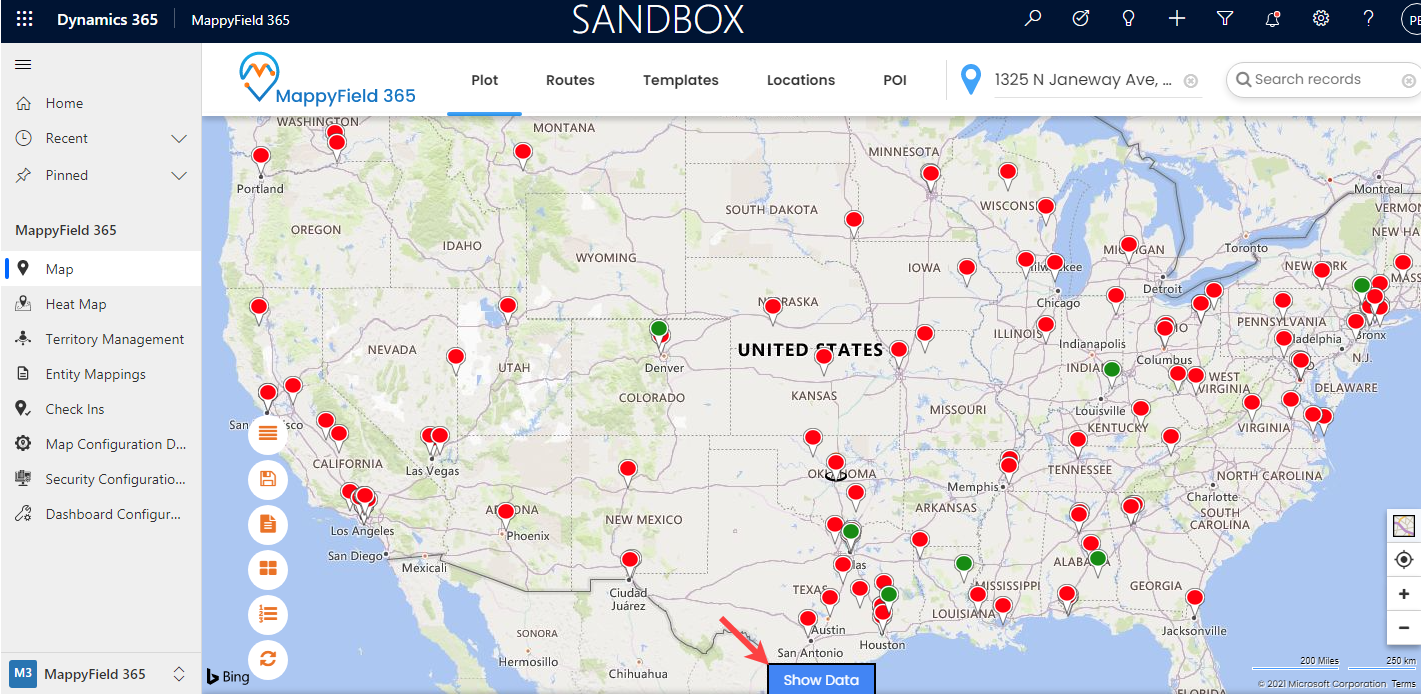
Once you plot the records on the map, you can check the plotted records of the entities in the Data Grid option. From here you can perform the various actions and activities by selecting multiple records.
For that, follow the below steps:
– Plot records on the map (follow the above Step 1 & Step 2).
– Once the records are plotted, you can see the “Show Data” button at the bottom of the Map.

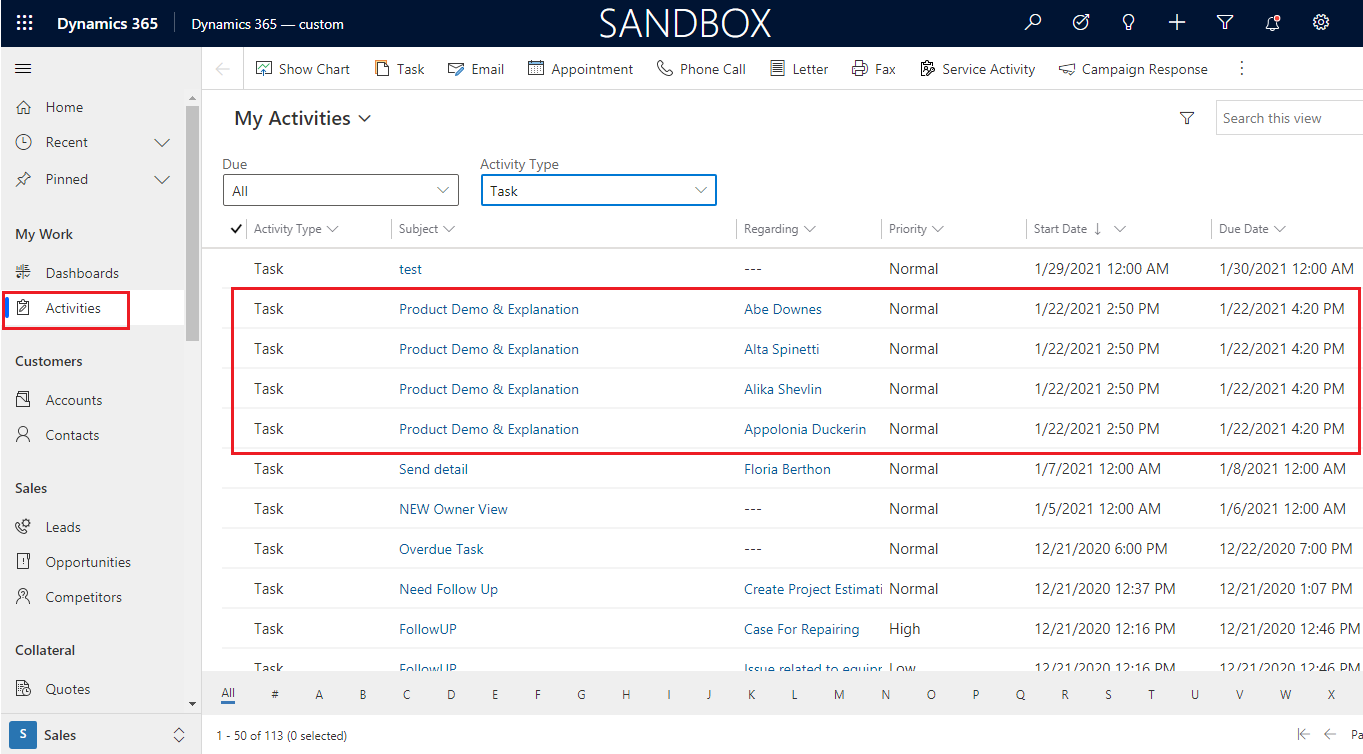
If the task is added for multiple records from the ‘Data Grid’ option, you can see the individual tasks of the entity records by navigating to the Task activities from the CRM side.

All product and company names are trademarks™, registered® or copyright© trademarks of their respective holders. Use of them does not imply any affiliation with or endorsement by them.


