A bookable resource is usually useful when the Sales/Team manager wants to schedule the field activities for any Field operations or Field services. This most commonly includes people, equipment, and physical spaces (facilities).
In this blog, we will explain how to create and manage a bookable resource in Calendar 365.
In Calendar 365, you can view bookings of any bookable resources, and you can also create and manage the bookable resource bookings.
You need to follow the below steps to enable & create the bookable resource.
– Enable the ‘Bookable Resource Booking’ from the Calendar 365 Configuration
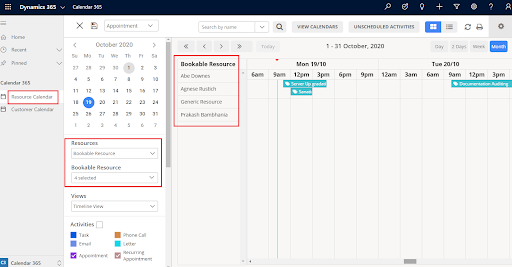
– Select the Bookable Resources in the Resource Calendar
– View the existing Bookable Resource and Create a new bookable resource activity
– Complete the Bookable Resource activity
Navigate to the Calendar 365
Navigate to ‘Calendar 365’ from the Dynamics 365 App page or App list.
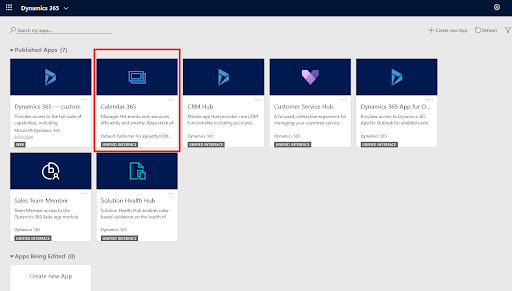
Navigate to the Calendar 365 Configuration
To enable the ‘Bookable Resources’ for Calendar 365, navigate to the Calendar 365 Configuration. By clicking on the ‘Settings’ icon, the Calendar 365 configuration page will popup.
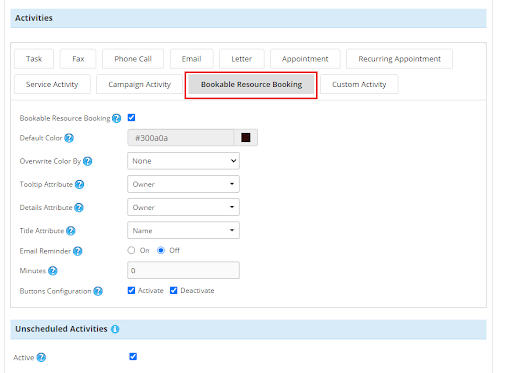
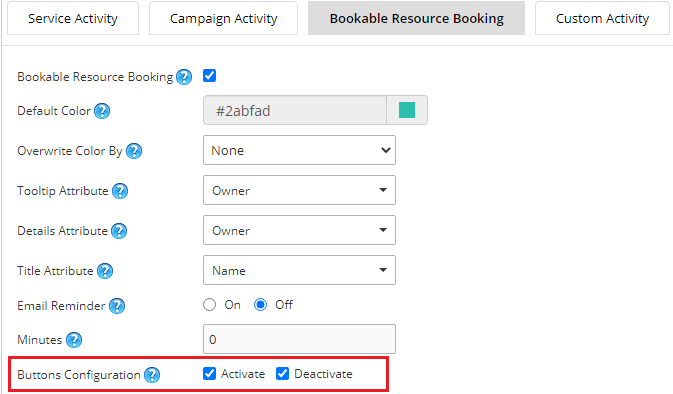
Under ‘Activities’, you will find the Bookable Resource Booking option. Enable the option and select the required attributes and other options.
Once you have selected the required options for the Bookable Resource, Save the Calendar 365 configuration. You will get the Bookable Resources in Calendar 365.
View Bookable Resource in the Calendar 365
To visualize bookable resource booking in the calendar navigate to Resource Calendar and select Bookable Resources as a ‘Resource Type’.
You can check the bookable resource records as per the view: day/week/month as well.
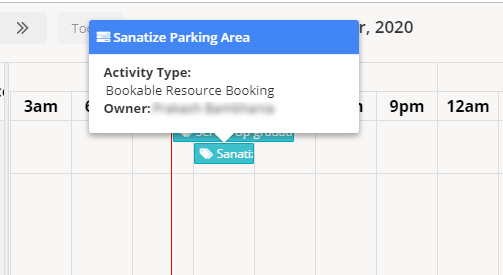
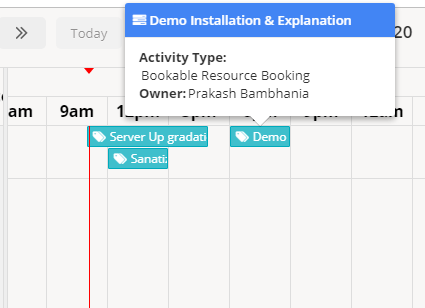
The Bookable Resource details will be displayed in a tooltip when you hover on any bookable resource.
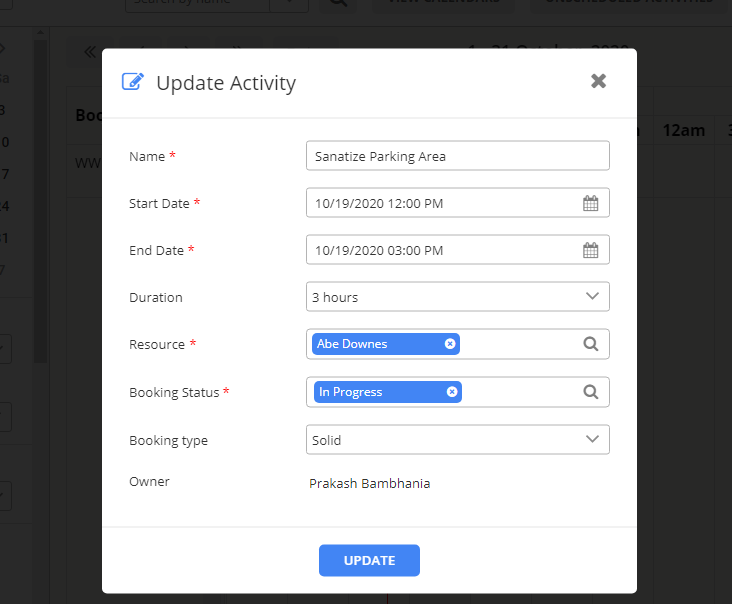
By clicking on that bookable resource it will display the details and you can edit the bookable resource data.
Create a Bookable Resources in the Calendar 365
You can also create bookable resource bookings by selecting a specific date & time from the timeline in the calendar.
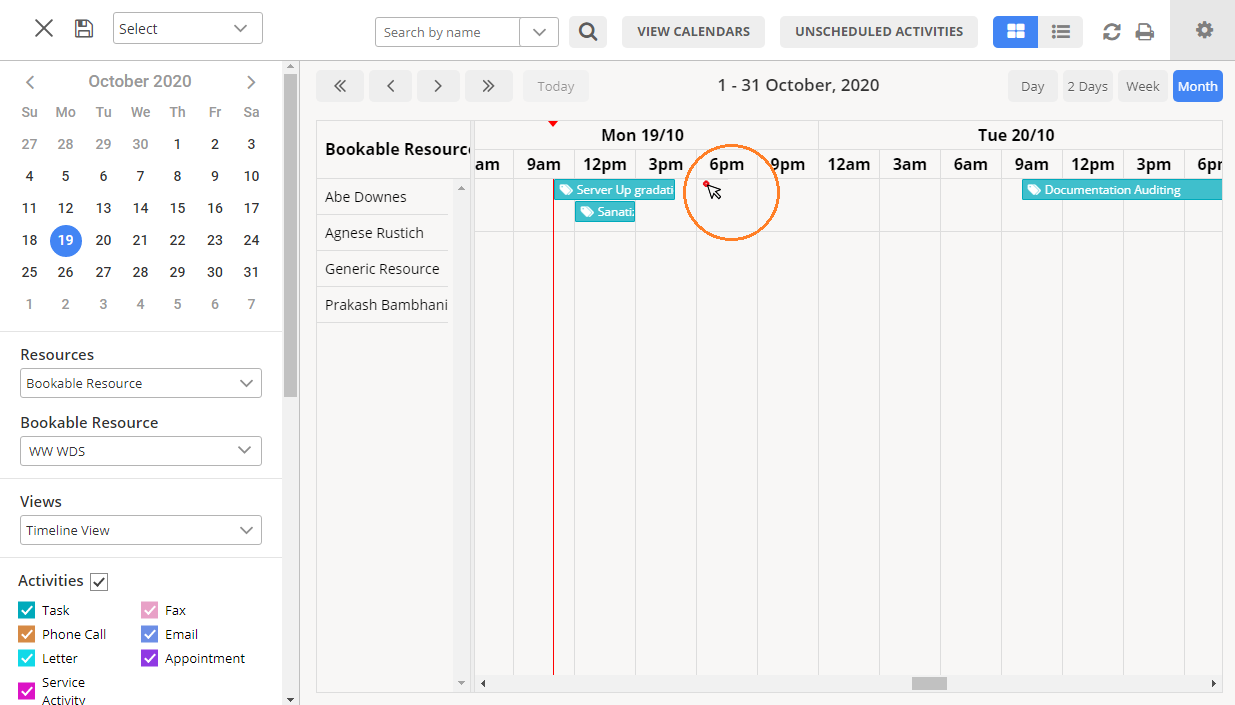
By clicking on the timeline, you will get a popup to create an activity of the Bookable Resource.
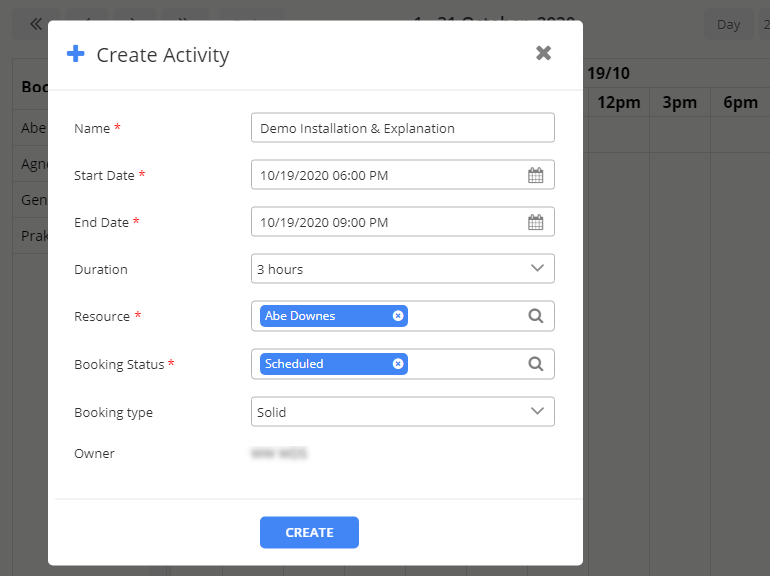
By clicking on the Create button, a resource will be booked and saved as a Bookable Resource activity.
You can edit the Bookable Resource details if there are any changes in it.
When the activity of Bookable Resource is done
Once the activity of the bookable resources is done, you can deactivate it from the Calendar. For that, you must have enabled the Button configuration from the ‘Calendar configuration’ under the Bookable Resource Booking activity.
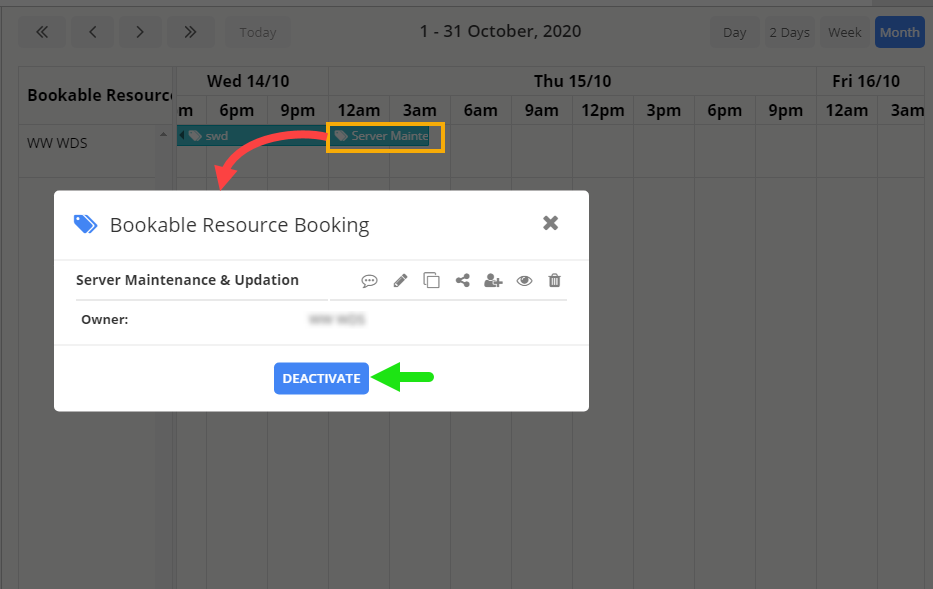
Click on any bookable resource booking activity which is completed. By clicking on it, the popup of that Bookable Resource will appear. From the popup, you will find the Deactivate button.
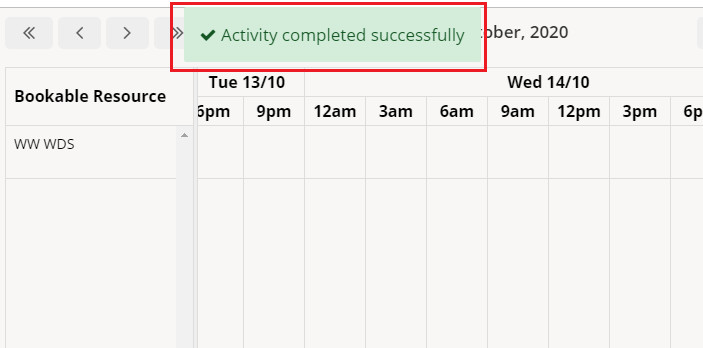
By clicking on it, the Resource Booking activity will be completed (deactivated).
The sales/team manager can create and manage the bookable resource booking and schedule the activities as per the availability.
If you are facing any issues with any feature, feel free to reach out to us at [email protected] or you can also tweet at us at @appjetty.
All product and company names are trademarks™, registered® or copyright© trademarks of their respective holders. Use of them does not imply any affiliation with or endorsement by them.


