In this blog, you will learn how to create a follow-up appointment in the Dynamics 365 Calendar.
Suppose you want to create a follow-up appointment (especially when you want to see which follow-up appointment was created towards which account at some point later). In that case, you need to set up a relationship between individual appointments.
Follow the below-mentioned steps to create a follow-up appointment in Calendar 365.
Step 1: Navigate to the AppJetty Calendar 365.
Click on “Calendar 365” from the apps list and navigate to the custom calendar of Calendar 365.
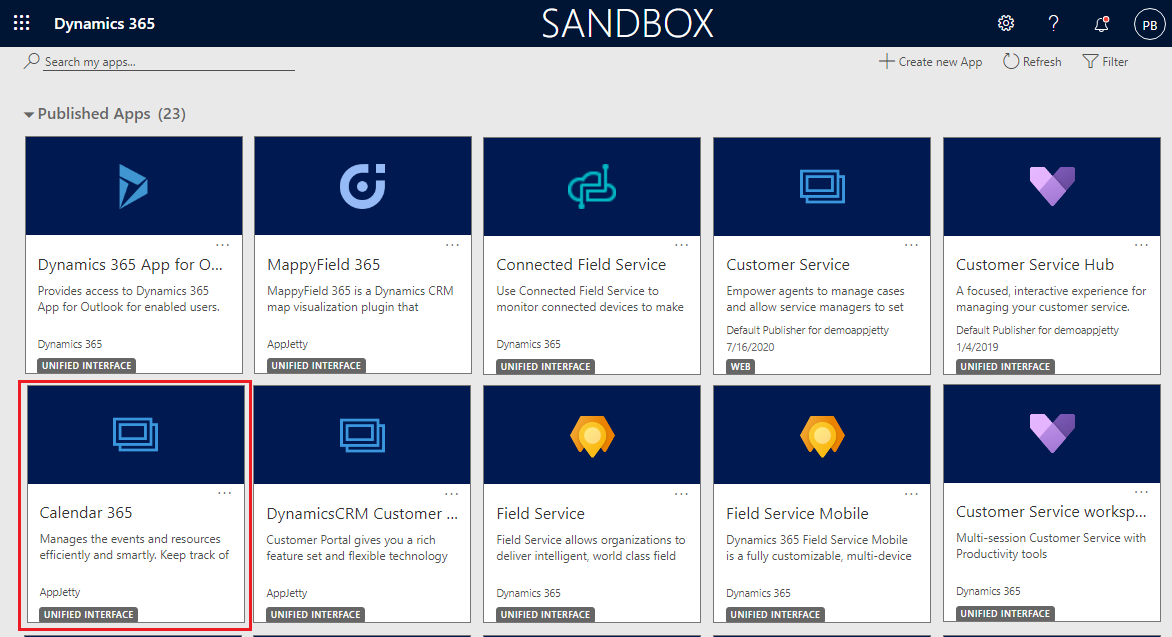
You will navigate to the custom calendar of Calendar 365. Here, you will see the three types of calendars:
> Resource Calendar
> Customer Calendar
> Entity Calendar
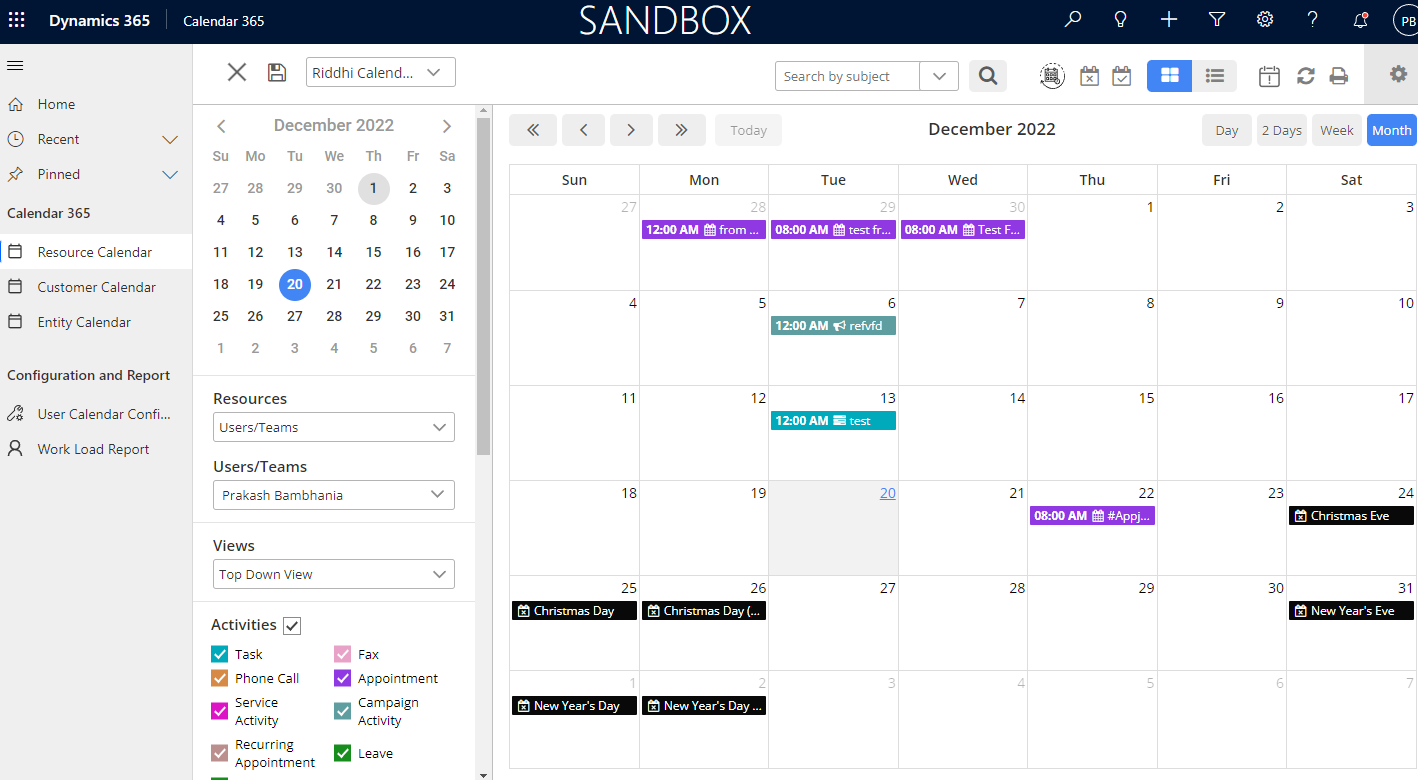
Step 2: Navigate to The Resource Calendar
Click on Resource Calendar, and it will show all the Appointments. Click on any Appointment.
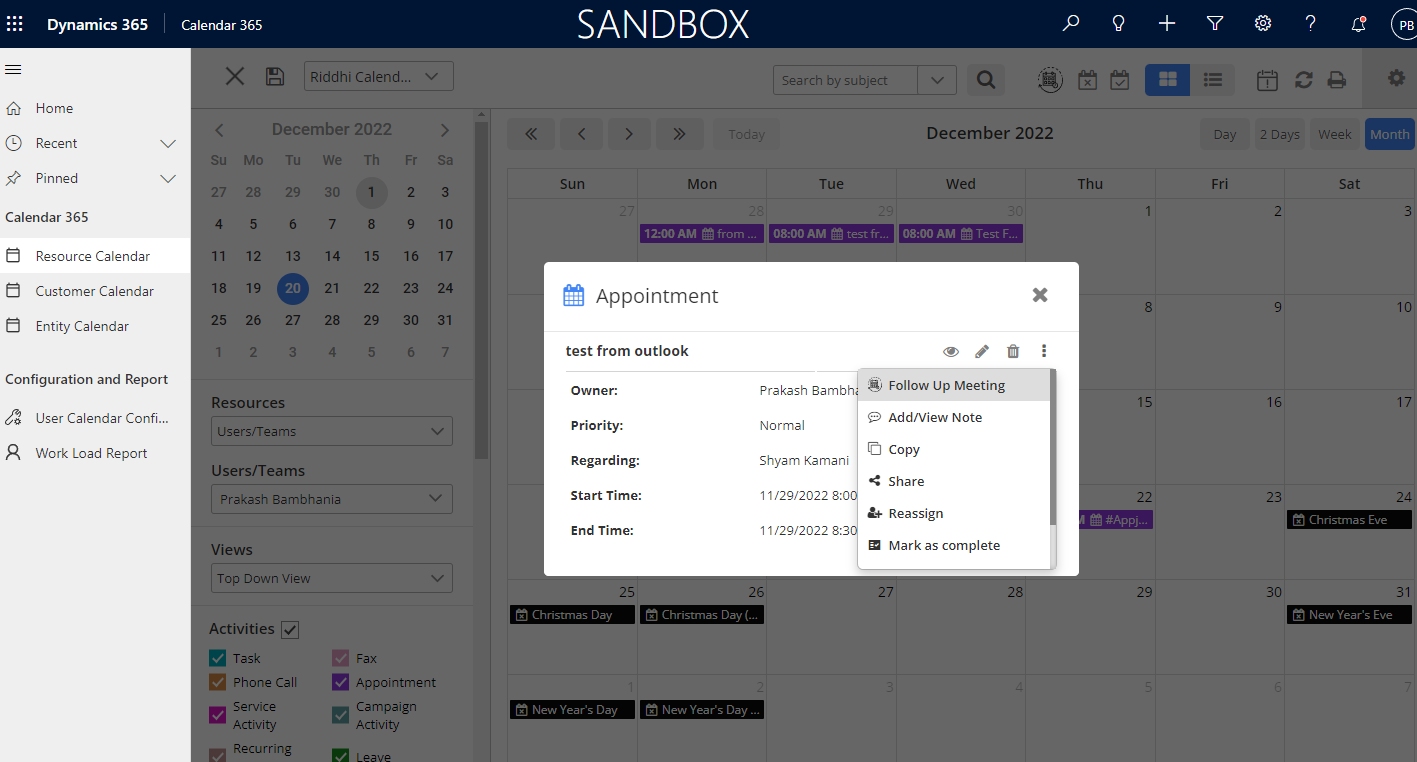
Step 3: Click The Follow Up Meeting
On clicking the Follow Up Meeting, the Create Follow Up popup will show up.
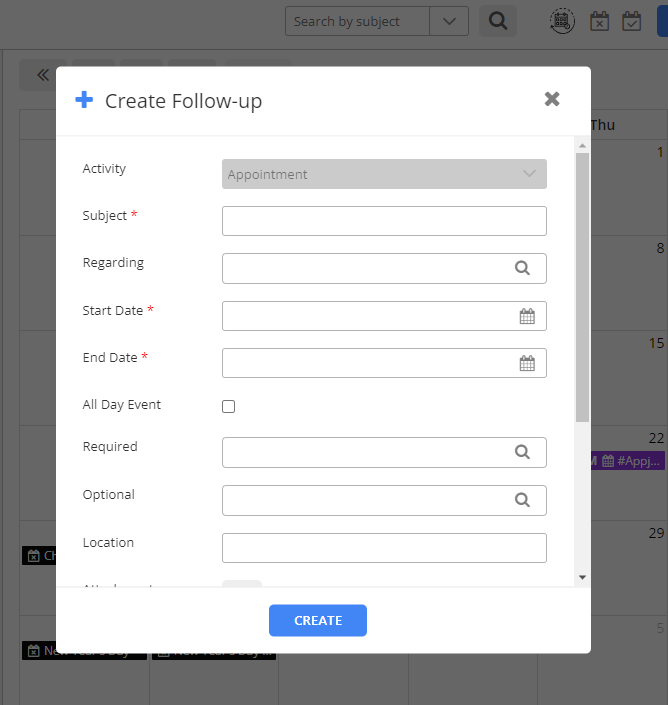
Enter The Subject Name, Regarding, Start Date, End Date, Required, Location, Attachment, Priority, and Description. Click on the Create button.
Step 4: Create a Follow-up Meeting that will open after clicking on the icon.
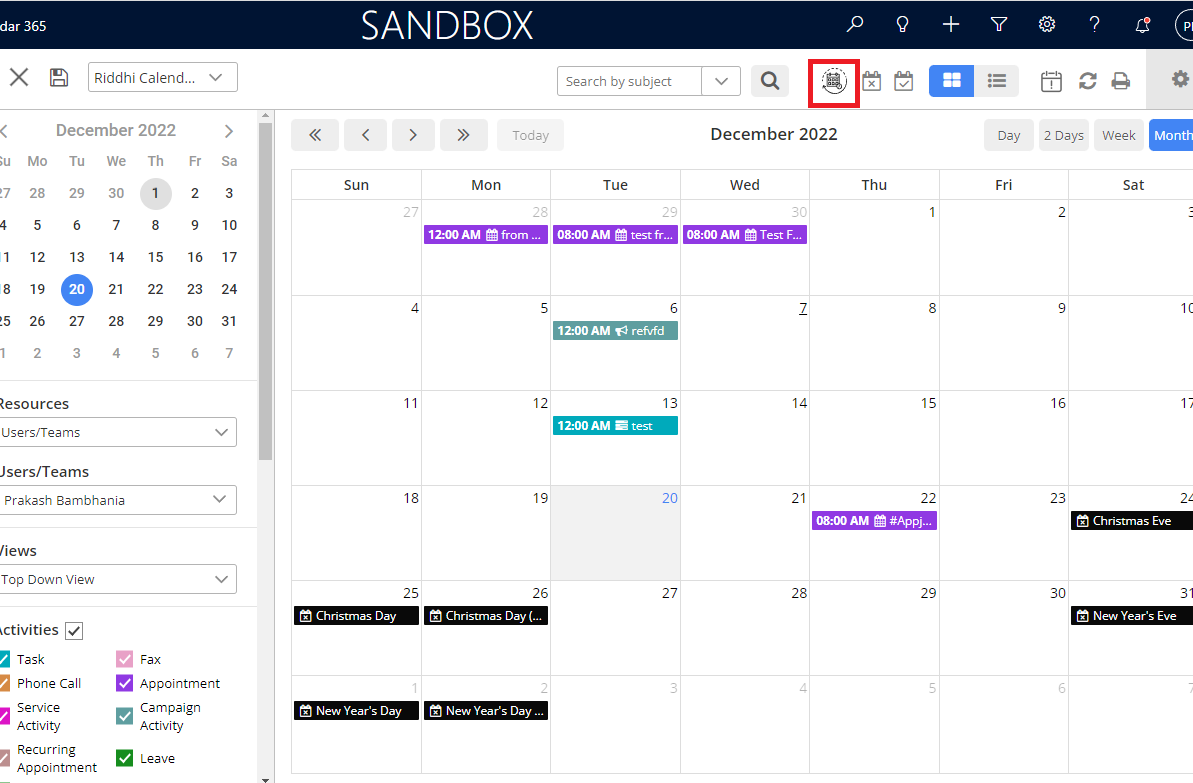
Click on the icon shown in the above image, and a popup of All Appointments will open. You can see all the appointments and follow-up meetings in the list view.
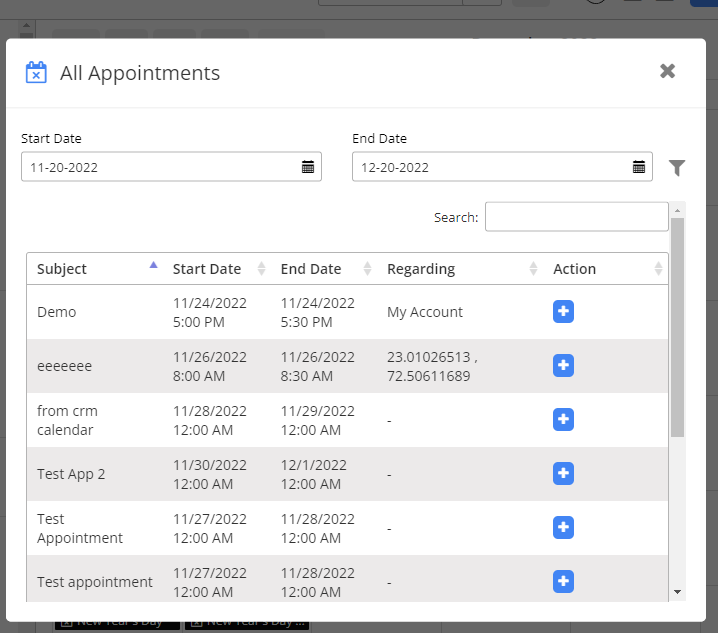
Select the Start Date And End Data, and Search for follow-up appointments.
Step 5: Directly Create a Follow-Up Appointment
Click the Plus icon in the list of appointments to directly create a new follow-up appointment. Enter all the information, then click the create button.
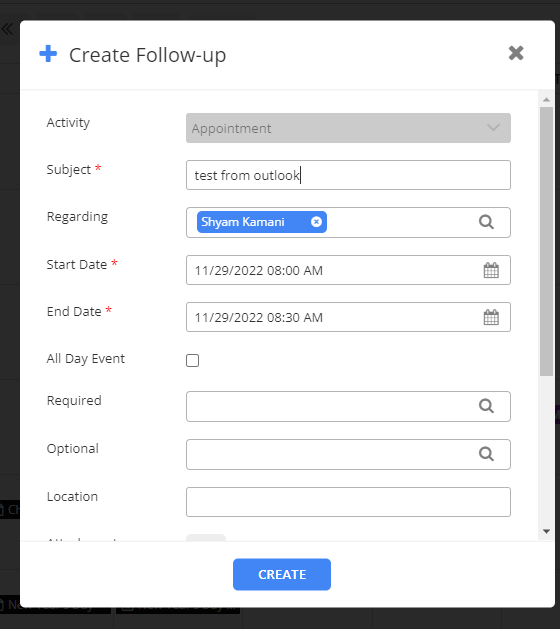
In this way, you can create a follow-up appointments in the resource calendar.
All product and company names are trademarks™, registered® or copyright© trademarks of their respective holders. Use of them does not imply any affiliation with or endorsement by them.


