AppJetty MappyField 365 provides a map visualization of the Dynamics of CRM records. You can manage the sales activities, define the routes, and perform different actions for the team.
You can plot the records on the map by selecting the required entities. When you do so, the records will be plotted using different pins for different entity records.
You can change the push pin appearance for specific records to recognize them on the map easily. You can also add a custom icon to personalize the entity records on the map.
Step 1: Navigate to MappyField 365
After logging into Dynamics 365, click on MappyField 365 from the Dynamics 365 Apps dashboard.

Step 2: Plot records on the MappyField 365 map
To plot records on the map, select the CRM entities configured from Entity Mappings. Under the Plot tab, select the Entity and its Records view. When you click on ‘Plot,’ you will see a pin by default. By clicking on ‘+Add Legend,’ you can add more entities, and pins will automatically be selected for the new entity. The selected pins will be plotted on the map.

Here, the ‘Accounts’ and ‘Contacts’ entities are selected. Upon clicking the Search button, the entity records will be plotted on the map, with pins differentiating between the entity records.
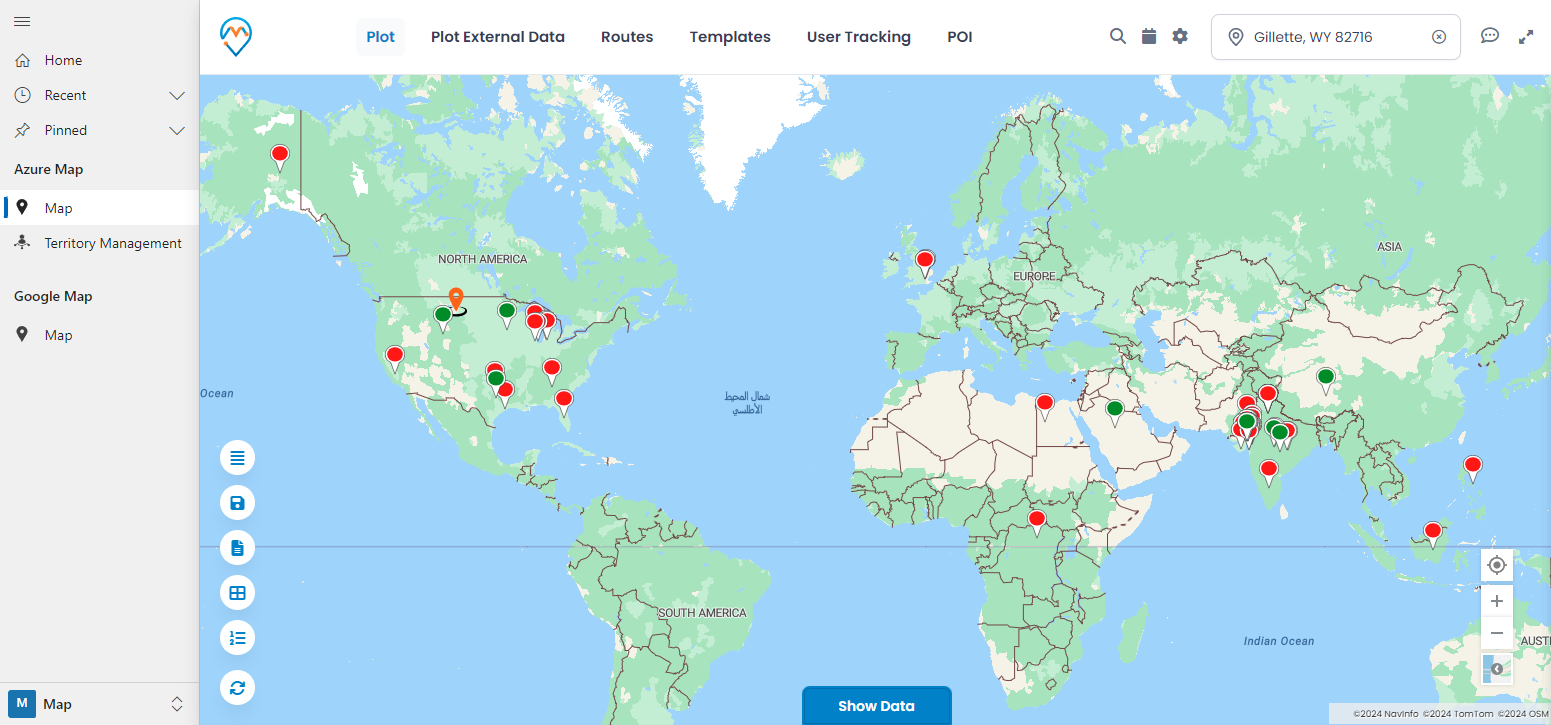
Based on the pin color, you can visualize the entity records and perform the corresponding actions on the map.
Step 3: Pin selection and customization
Step 3A: Change the pin shape and color If you want to change the pin for a specific entity, MappyField 365 allows you to change the pin’s color and select the pin’s shape to differentiate the plotted entity records.
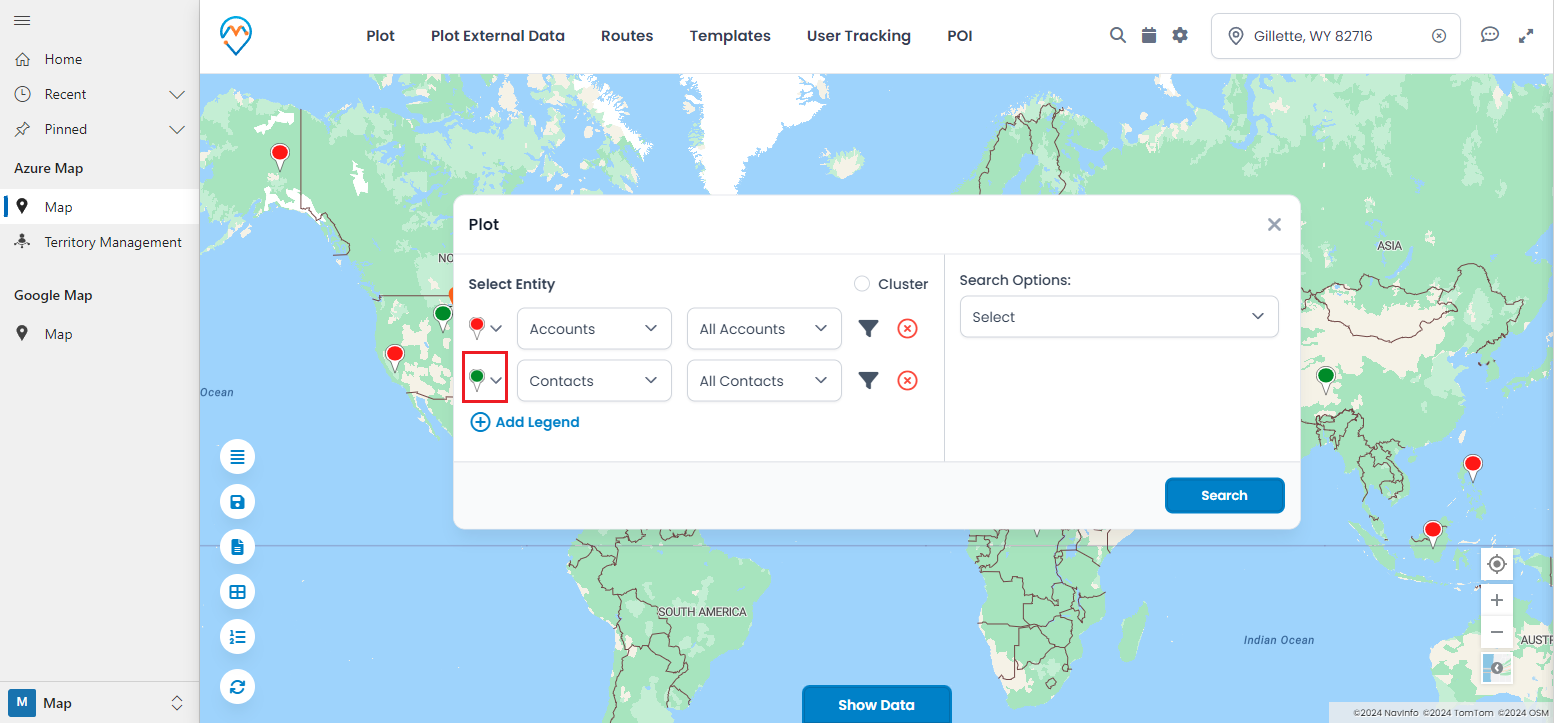
Under the ‘Plot’ tab, clicking on the pin icon of the ‘Contacts’ entity will open the pin selection tool. You can select shape and color options based on the given combinations.
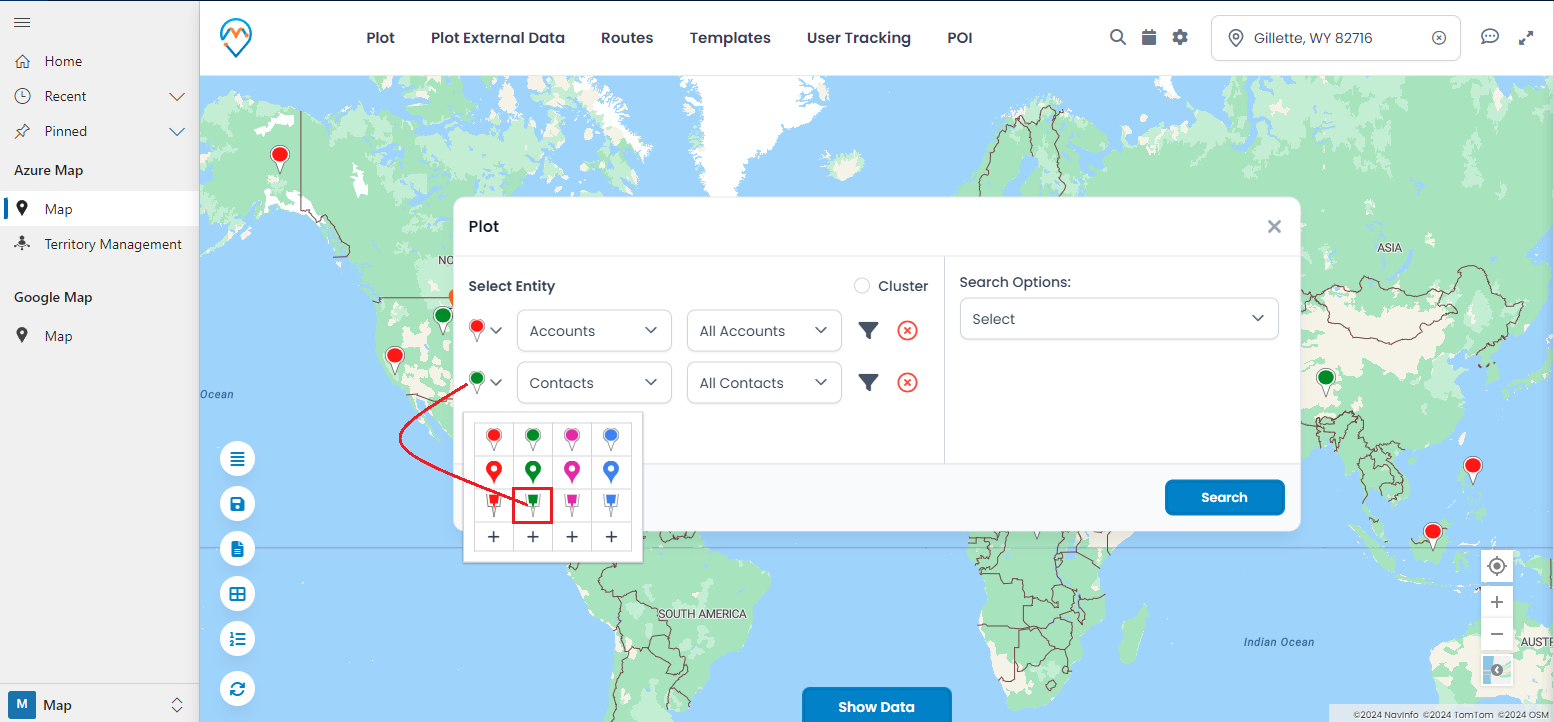
By selecting any of the pin shapes and colors, the pin representing the entity records will be changed and replaced on the map.

Step 3B: Add customize Pin icon
You can also add your pushpin icon by browsing the image icon from your local drive to define and visualize the pins for a specific entity record on the map.
You can add the icon for a specific pin by clicking on the “+” (add) icon.
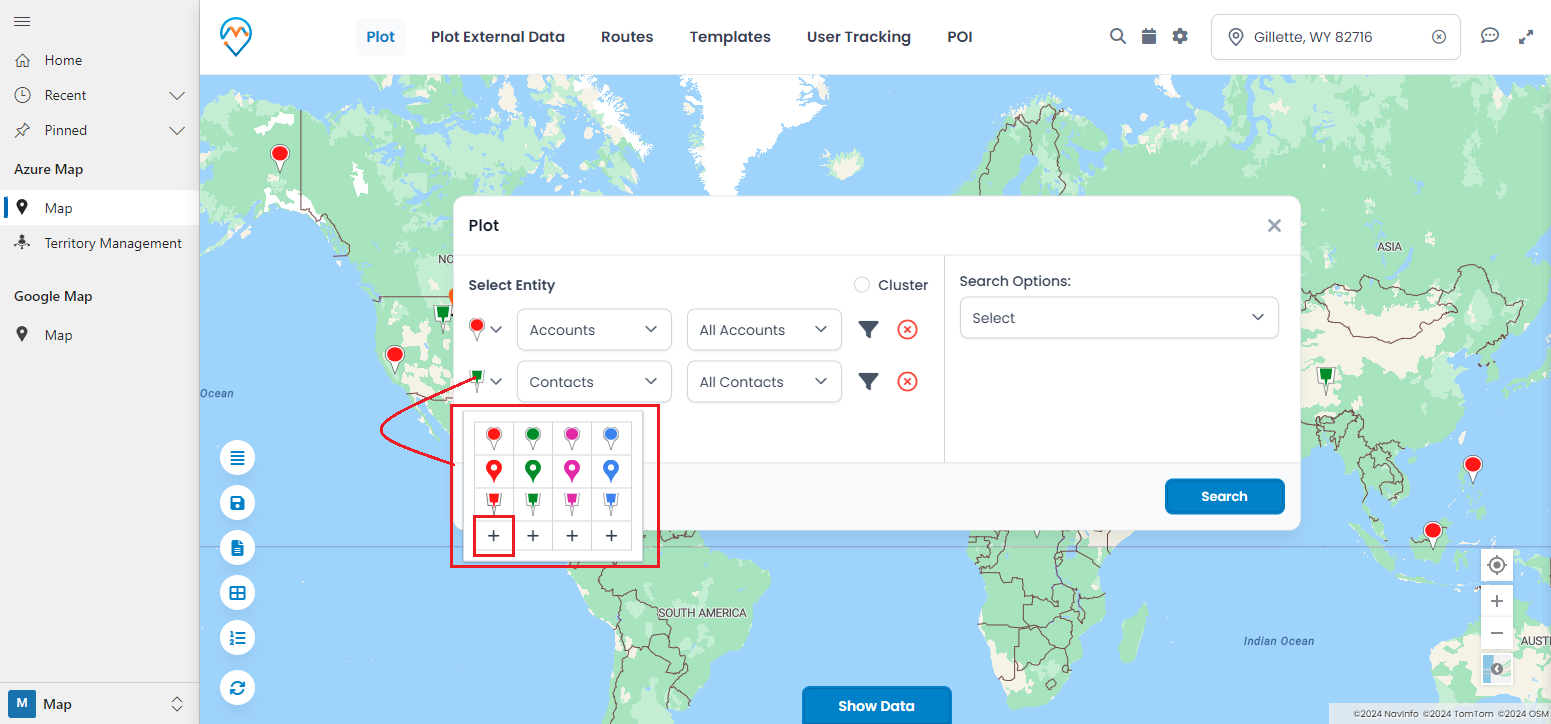
By clicking on the “Add +” icon, the “Select Custom Pin” popup will appear, allowing you to add an icon to define the pin for specific entity records.
You must insert an SVG file with a height of 30px and a width of 20px. You can download a sample SVG file or add a new SVG file.
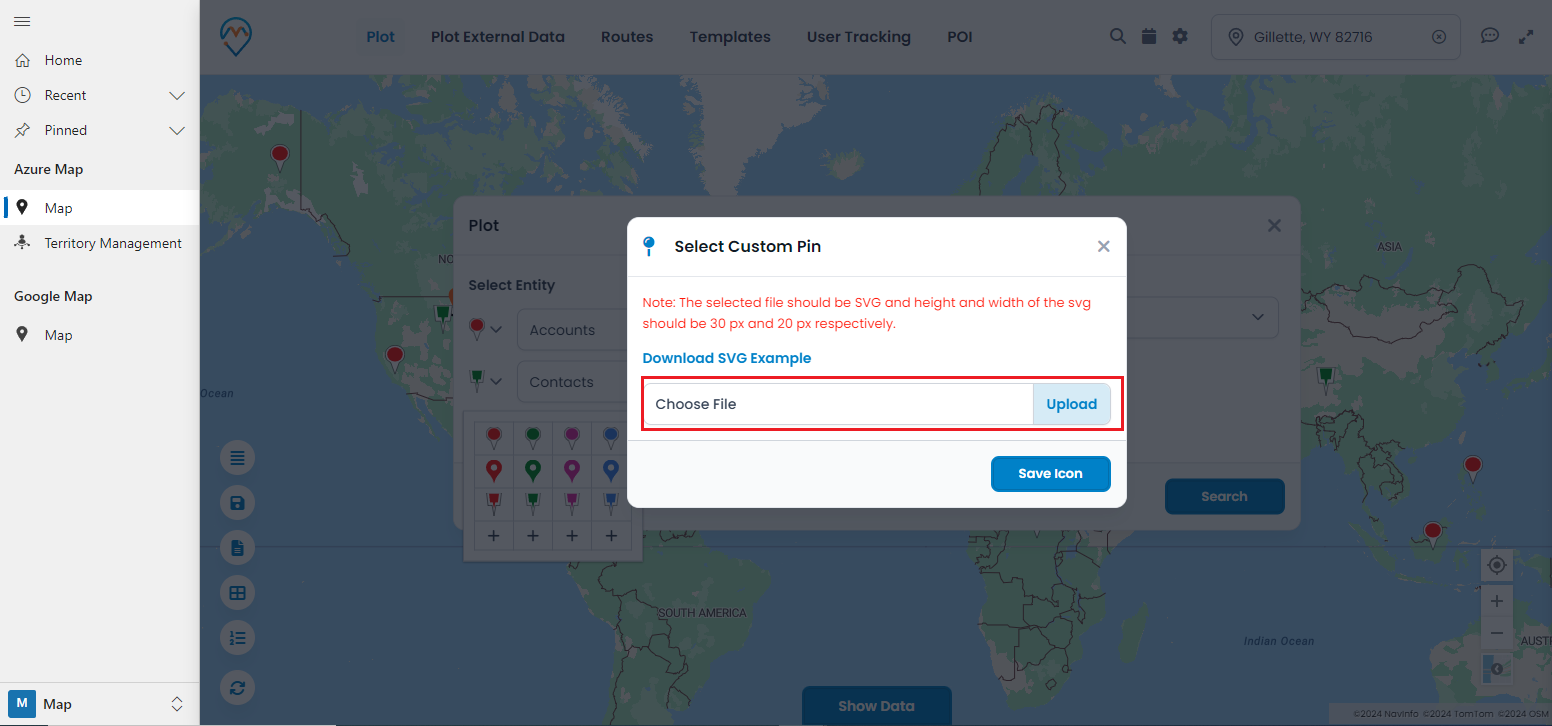
Once you have uploaded the SVG file, click on the “Save Icon” button to add the selected icon to the pin selection.
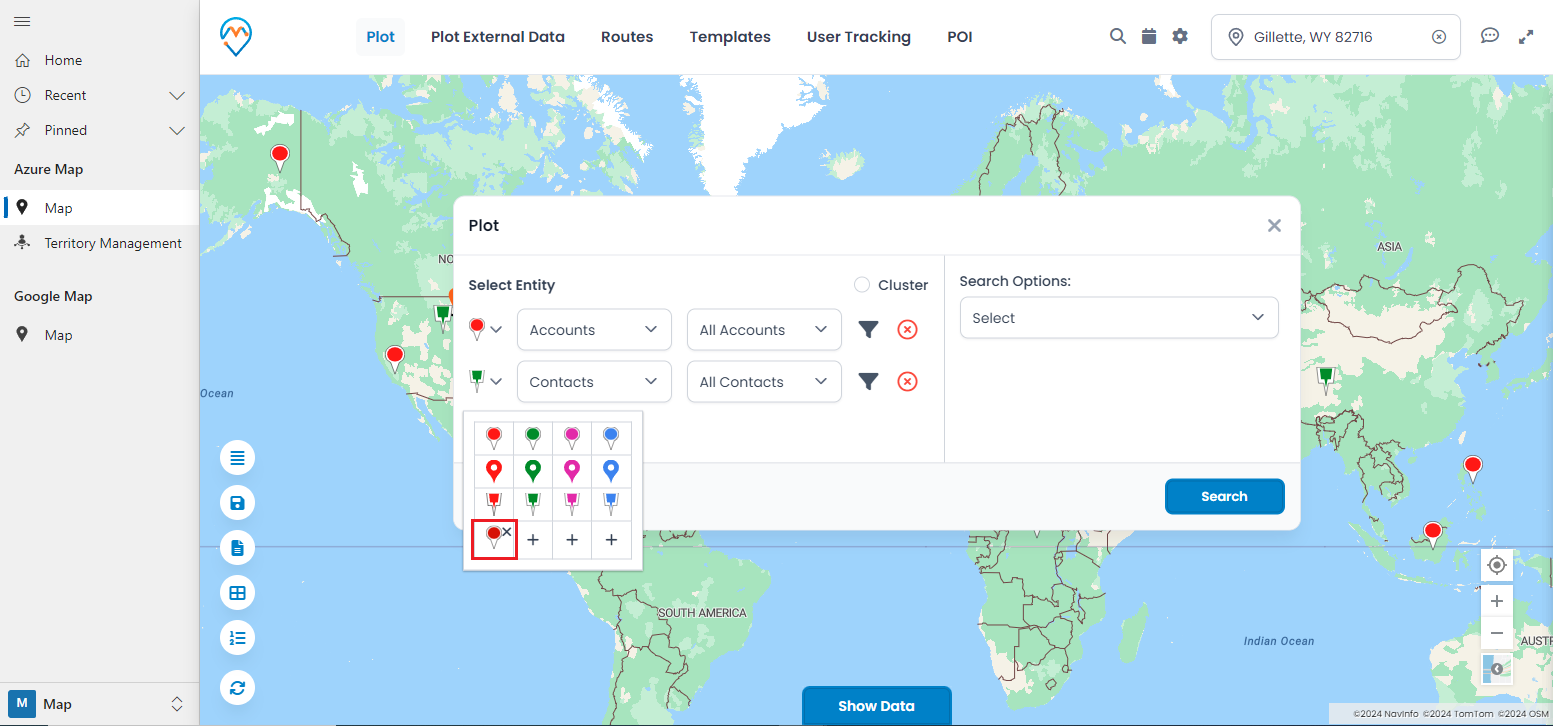
By clicking on the newly added “Customize” pin, the pins on the map will be replaced with the new icon. You can now see the newly customized pin for the Contact records on the map.
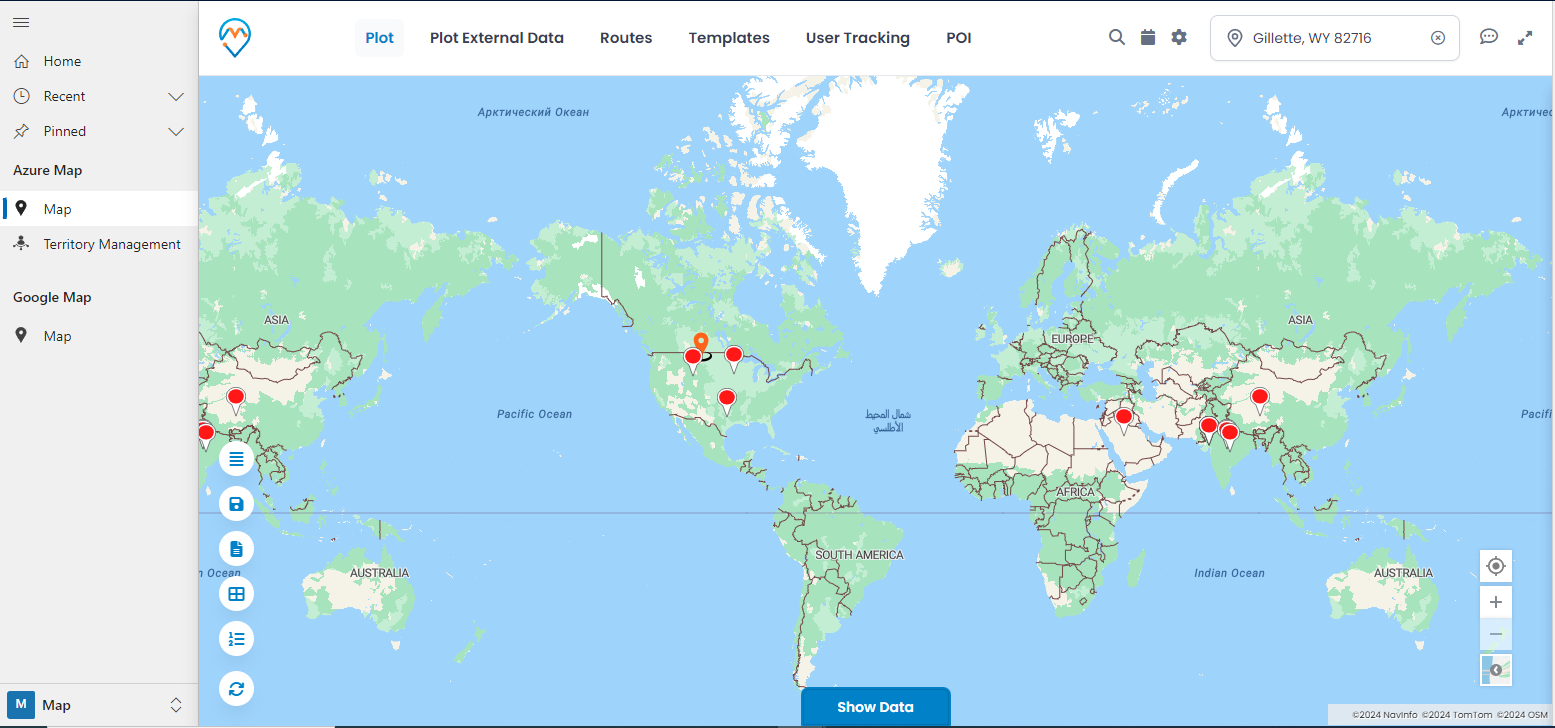
In this way, users of MappyField 365 can customize and change the pin icon to differentiate the plotted records on the map. This helps provide a visual overview of various records.
All product and company names are trademarks™, registered® or copyright© trademarks of their respective holders. Use of them does not imply any affiliation with or endorsement by them.


