When the sales team gets a lead, they will have telephonic discussions or physical meetings to take the lead forward and turn it into the customer. The sales executives will have a business meeting with the client and they might require more team members in that Business meeting.
AppJetty Calendar 365 is a Microsoft Dynamics CRM plugin that manages the CRM activities on a custom calendar. The default calendar of the DynamicsCRM has some limitations to manage the activities and requires lots of manual setups by navigating different backend options. But, from the custom calendar of Calendar 365, admin users can add/edit, track, and manage the CRM activities from the calendar itself.
Admin users can add appointments from the custom calendar by adding the required attendees (CRM users/teams).
Suppose, there is a manufacturing company that provides electronics devices and cables for the medical devices that are used in the hospitals. The sales executive of that company gets a lead from a multi-purpose hospital for repairing some of the medical/health devices. So, they scheduled the meeting regarding the same. But, In that meeting, the sales executive needed a technical person who understands the questions and requirements.
Calendar 365 provides the pre-defined attendee’s/attendees’ selection who always requires an appointment or any business meeting. You can select the CRM’s ‘Required’ and the ‘Optional’ fields during the configuration of the Appointment activity and the Recurring Appointment activity. So, you don’t have to check who will be in the Appointment with the clients.
Let’s see how to pre-select the CRM records and how they will appear when we add an appointment activity.
Step 1: Navigate to the AppJetty Calendar 365
Open Calendar 365 to manage and track the CRM activities of the team members.
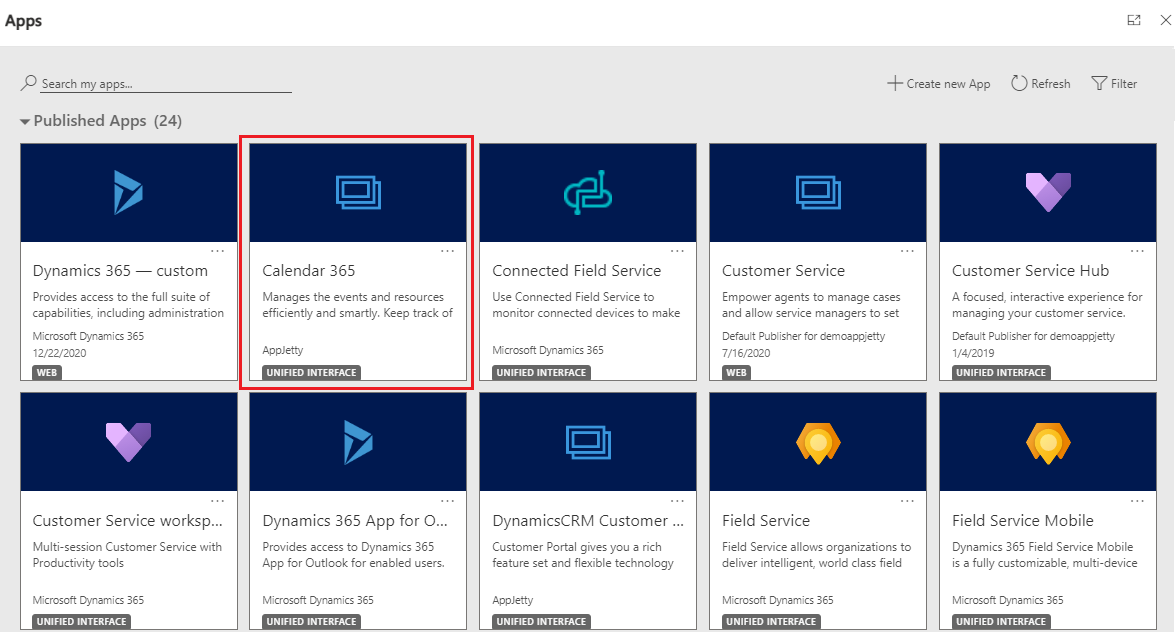
You will navigate to the custom calendar of Calendar 365.
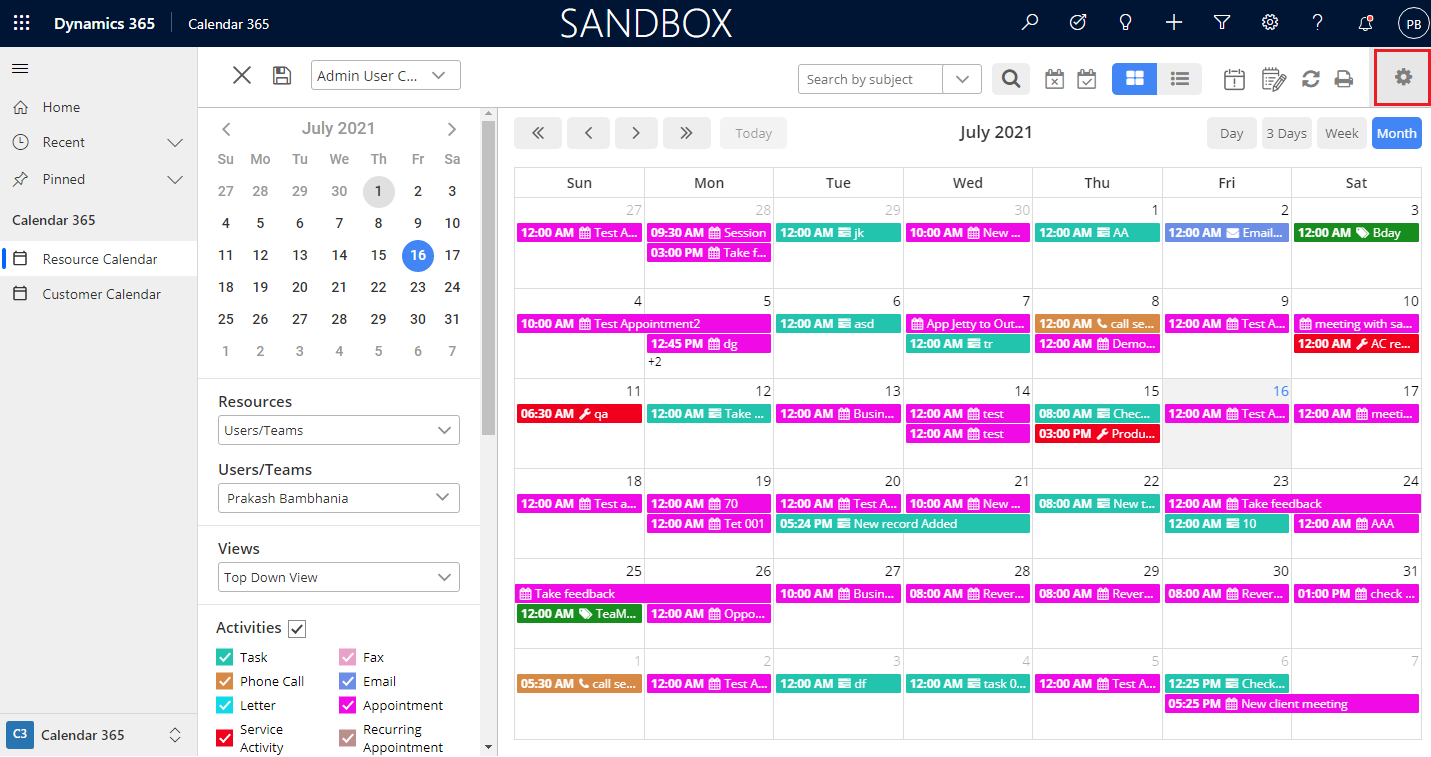
From the top-right side corner, you will find the ‘Settings’ (gear) icon to configure Calendar 365 settings.
By clicking on the ‘Settings’ icon, the Calendar 365 configuration tab will open.
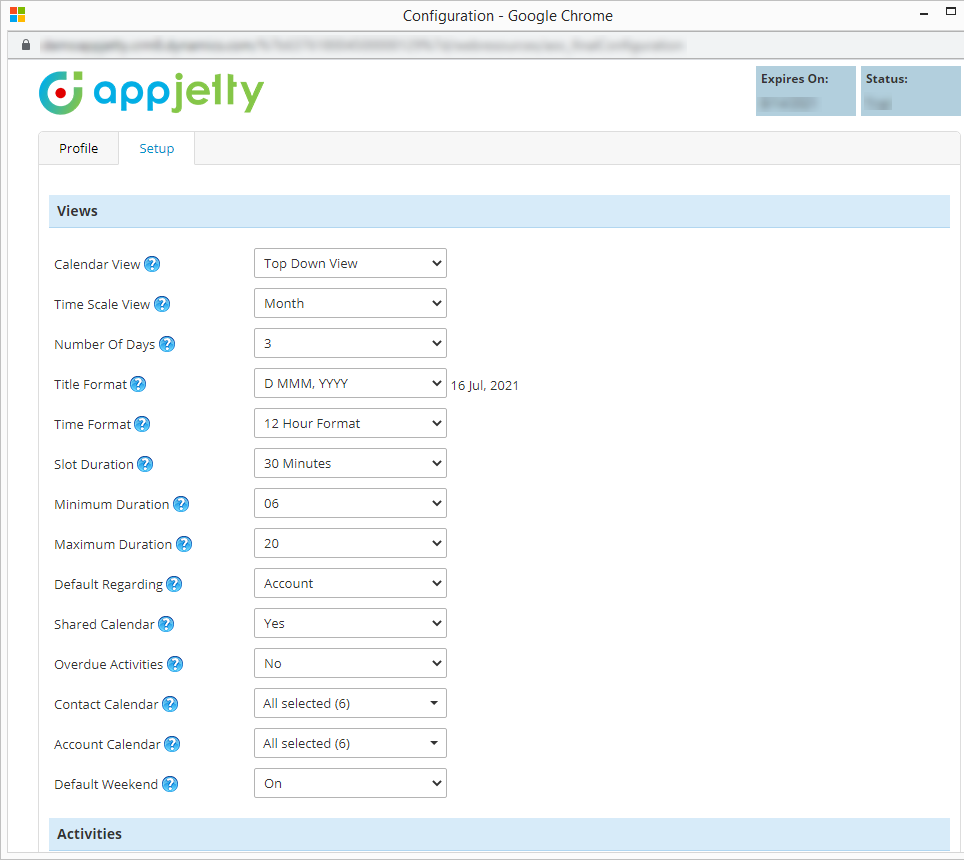
Step 2: Find the “Activities” section from the Configuration
Scroll down to the Activities section from the configuration page and click on the Appointment tab.
By activating the Appointment, you will find the different options to configure the Appointment activity to be displayed into the custom calendar.
Step 2.1: For the “Appointment” activity
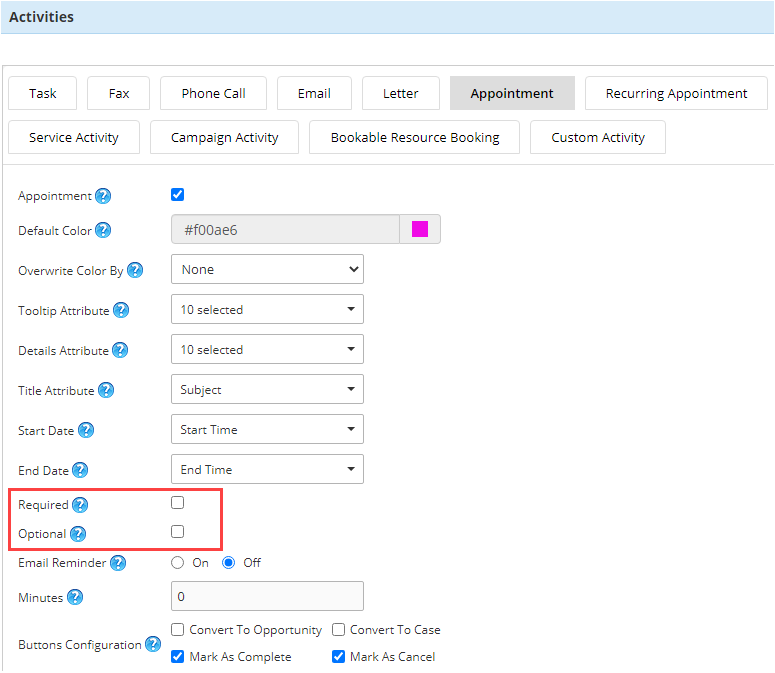
You can select the default attendees (CRM Records) for the Required field and/or Optional field. The selected attendees will appear by default when you or your team (users) create an Appointment activity from the custom calendar.
After enabling the checkbox you will get the input box with the ‘Search’ icon.
![]()
By clicking on the ‘Search’ (magnifier) icon, the LookUP Records will pop up from where you can select the CRM users/teams/records for the pre-selection of the appointment activity.
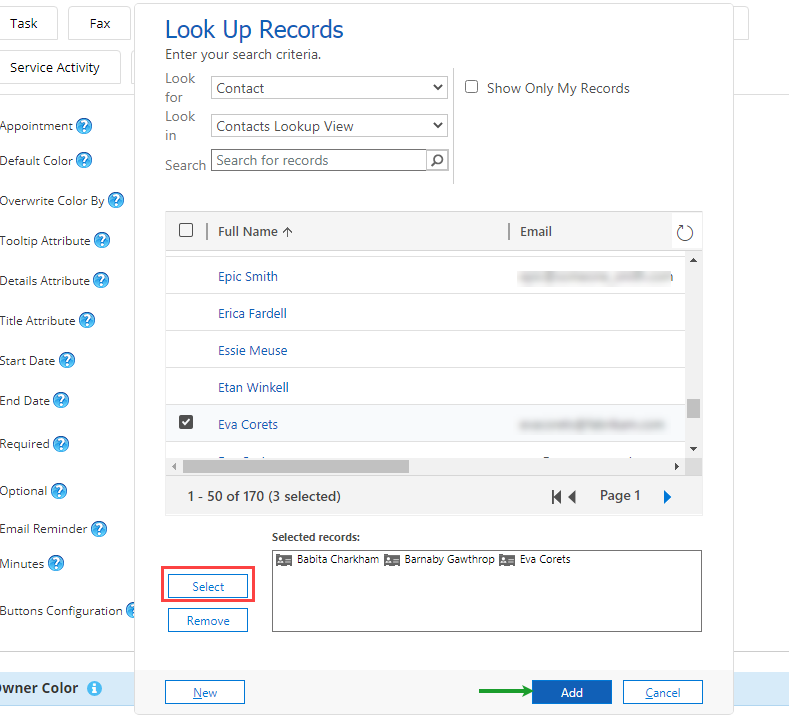
You need to select the records from the list which you want to set as default required attendees. After selecting from the list, click on the Select button to add into the ‘Selected records’ box and by clicking the Add button, the records will be added to the Field.
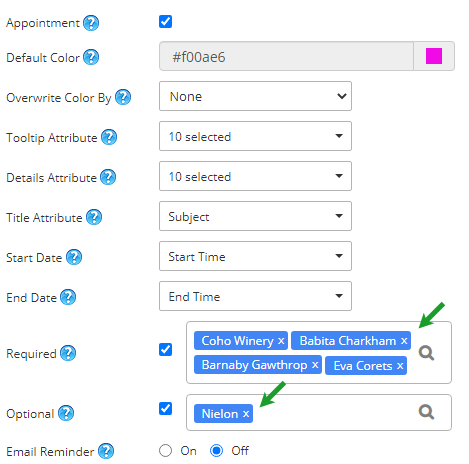
In the same way, you can add the default attendees for the “Optional” fields as well.
The sales executive of the manufacturing company can select the attendees who are required when the Appointment activity is created. In short, when the Business meeting (Appointment activity) is scheduled, some of the Team members/attendees (CRM users) who could be technicians, legal advisers will always be required. So, the sales executive can pre-select the attendees and that will be selected by default during the Appointment activity creation.
Once you select the attendees in Appointment activity configurations, click on the Save button to apply changes.
Step 2.2: For the “Recurring Appointment” activity
You can also select the default attendees in the Required and/or Optional fields for the “Recurring Appointment activity”.
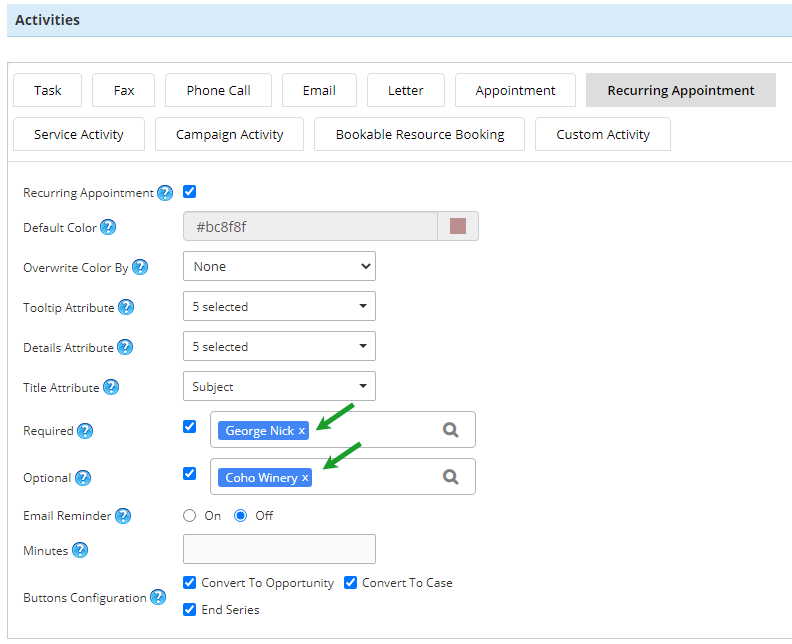
The sales executive can select the CRM records (attendees) for the “Recurring Appointment” activity if weekly report meetings regarding the sales activity and demos are required. The executive will not be required to select the attendees when the Appointment and Recurring Appointment is being added as the attendees will be selected by default.
Step 3: Navigate to Resource Calendar
Once you have saved the configuration, navigate to the Calendar 365 tab (Resource Calendar). You need to ‘Refresh’ the calendar to apply the configuration changes.
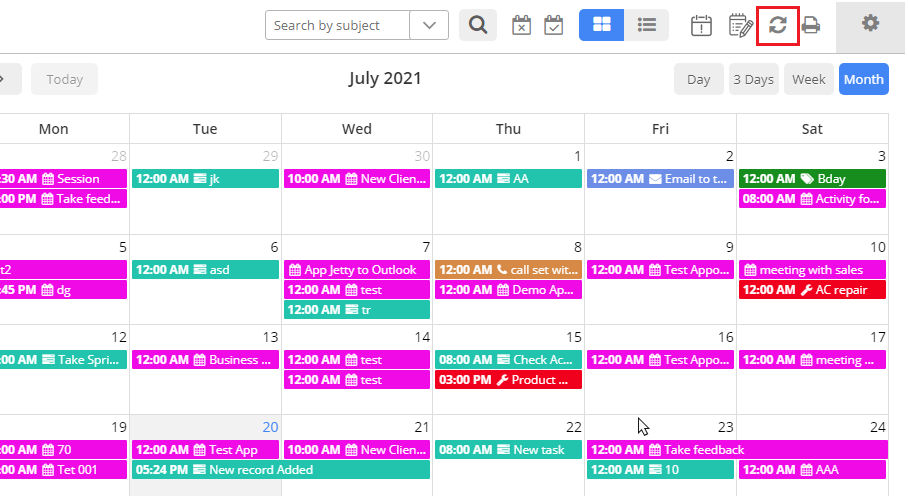
Now, by clicking on the specific date, the + Create Activity popup will appear. You can add any activity by selecting the type from the “Activity” dropdown option.
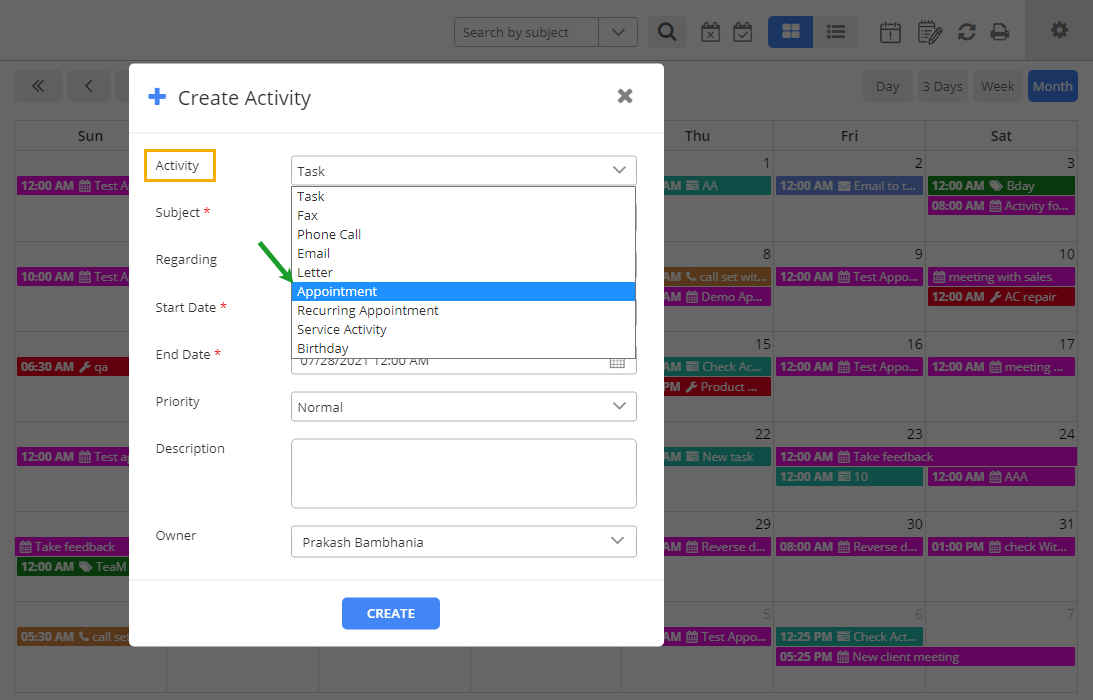
If you select the Appointment from the “Activity” dropdown option, the Required and/or Optional fields will be selected.
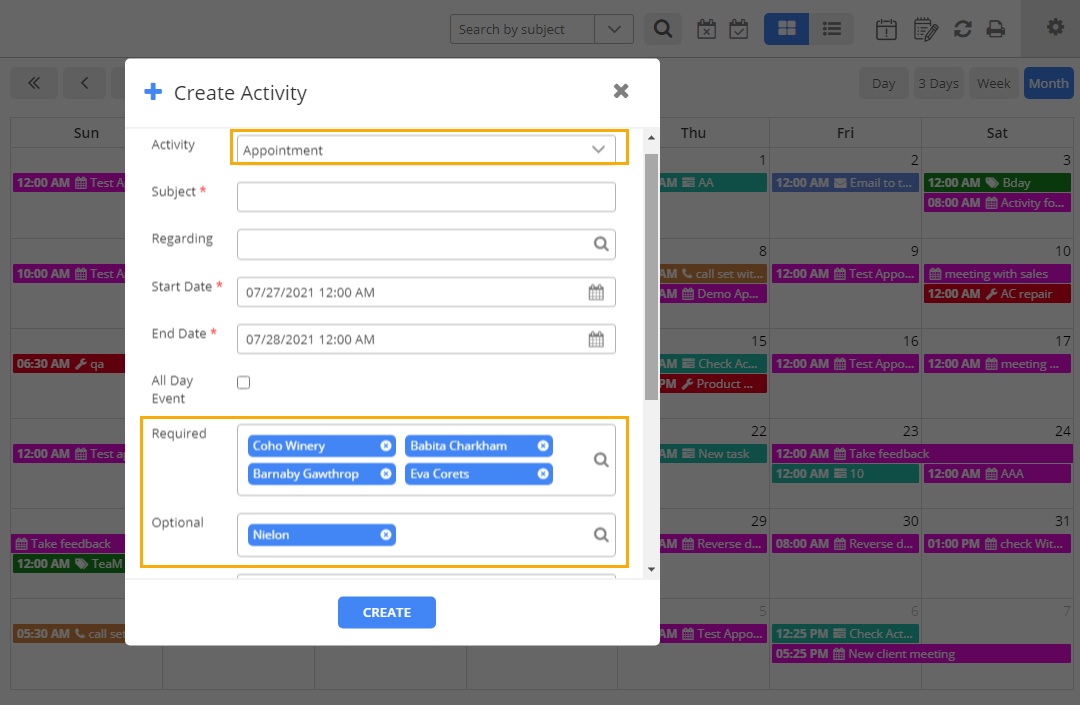
You will get the default selected Required/Optional attendees as you have selected from the Calendar configuration in the Appointment activity.
Similarly, you will get the default selected Required/Optional attendees for Recurring Appointment as well.
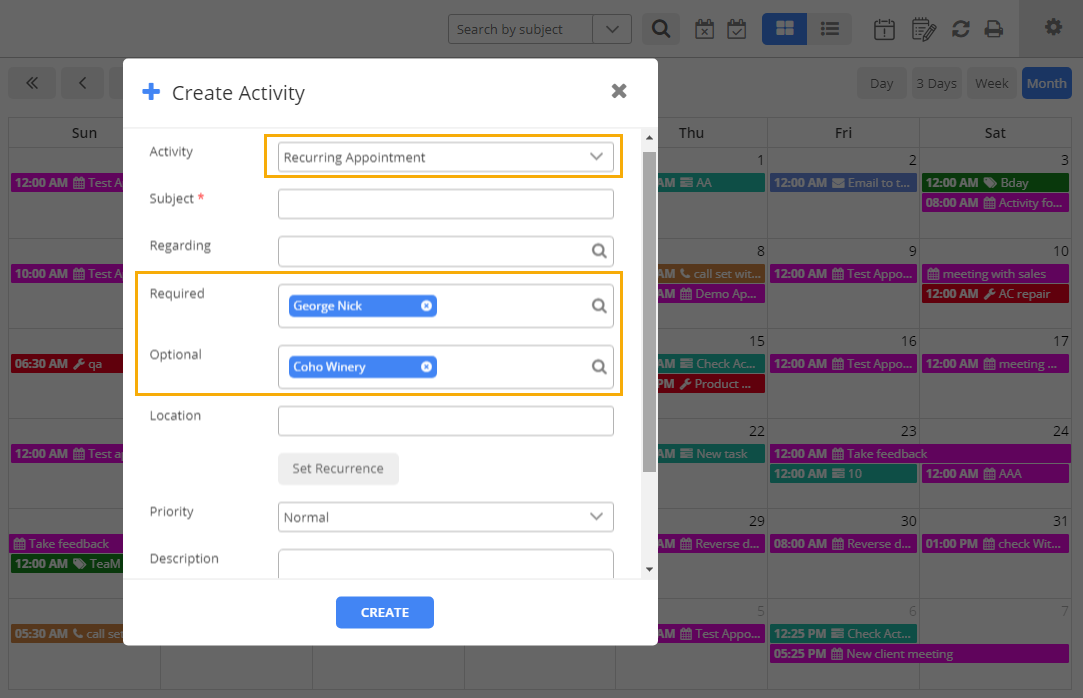
In this way, you can keep selecting the required attendees (DynamicsCRM records- users/teams) for the ‘Required’ and ‘Optional’ fields in the Appointment and Recurring Appointment activities. So, the Dynamics users will not require to add the records in the Required/Optional fields every time.
Microsoft Dynamics CRM app, AppJetty Calendar 365 provides to manage and track all the enabled CRM activities on the activity calendar. The users with DynamicsCRM administrator rights can create and schedule the activities in Calendar 365 effortlessly.
If you want to know about any feature regarding AppJetty Calendar365, feel free to reach out to us at [email protected] or you can just click on “Contact Us”.
All product and company names are trademarks™, registered® or copyright© trademarks of their respective holders. Use of them does not imply any affiliation with or endorsement by them.


